Db::name($this->table)->alias($alias)
->where($condition)
->where(function ($query) use ($condition_or) {
    $query->whereOr($condition_or);
})
->order($order);
遇到whereOr和where组合链式操作会把or条件和and条件并列处理
使用闭包放在where里就可以加上类似 and ( xxx or xxx)的条件了
去芜存菁
Db::name($this->table)->alias($alias)
->where($condition)
->where(function ($query) use ($condition_or) {
$query->whereOr($condition_or);
})
->order($order);遇到whereOr和where组合链式操作会把or条件和and条件并列处理
使用闭包放在where里就可以加上类似 and ( xxx or xxx)的条件了
<span class="form-control-unit">万元</span>

.form-control-unit {
    position: absolute;
    top: 0;
    right: 0;
    z-index: 2;
    display: block;
    width: 34px;
    height: 34px;
    line-height: 34px;
    text-align: center;
    pointer-events: none;
}首先 在父页面创建一个div id = detail_page_data, 在ifram1 调用parent.layer_open的时候保存 ifram1的index
然后在ifram2里可以获取ifram1的index从而通过parent 拿到ifram1的contentWindow.document
然后就可以操作ifram1里的信息了
var relation_layer_index = parent.$('#detail_page_data').data('relation_layer_index');
var relation_ifram = parent.$('#layui-layer-iframe'+relation_layer_index);
$doc = relation_ifram[0].contentWindow.document;
$($doc).find("#bargain_uid").val()
该篇主要描写权限部分的配置
1.对用权限相关表创建model:admin/model
->Group
->AuthRule
2.为多站点做准备 创建site表
创建model: app/common/model/
->Site.php
3.将之前创建的app/model.php 移到app/common/model/下
修改common.php model方法使用的路径
function model($table = '')
{
    return new \app\common\model\Model($table);
}
4.将之前创建的app/admin/model/BaseModel 移到app/common/model/下
修改之前extend baseModel的model里引用路径
5.baseController添加
protected function assign($name, $value = '')
    {
        View::assign($name, $value);

        return $this;
    }
一番设置 后台首页就展示出来了
6.app\request下添加function
/**
     * 当前访问模块
     * @param string $module
     */
    public function module($module = '')
    {
        return App('http')->getName();
    }

    /**
     * 解析url
     */
    public function parseUrl()
    {
//        $addon = $this->addon() ? $this->addon() . '://' : '';
        $addon = '';
        $result =  $addon.$this->module().'/'.$this->controller().'/'.$this->action();
        return strtolower($result);
    }
7.系统基础设置页面
8.权限管理页面
//切换composer 为国内 阿里源
composer config -g repo.packagist composer

//创建项目tp_base
composer create-project topthink/think tp_base
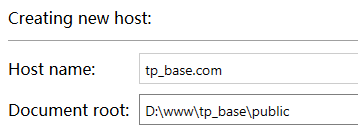
解析测试域名到项目

//tp多应用安装
composer require topthink/think-multi-app

//tp模板引擎
composer require topthink/think-template
composer require topthink/think-view

//tp验证码
composer require topthink/think-captcha

//tp翻页
composer require big-dream/think-paginator-driver

//tp whoops
composer require xiaodi/think-whoops

//tp log
composer require topthink/think-log

//tp 权限
composer require liliuwei/thinkphp-auth=2.0.*

//图片管理
composer require  intervention/image
1.使用多应用模式
//创建多应用
php think build index
php think build admin
php think build common

2.配置权限管理
配置权限管理前需要先把mysql的连接参数配置好
copy .example.env 到 .env 然后配置mysql连接参数

修改config下auth.php
return[
    // 权限设置
    'auth_config'            => [
        'auth_on'            => true,                      // 认证开关
        'auth_type'          => 1,                         // 认证方式,1为实时认证;2为登录认证。
        'auth_group'         => 'auth_group',        // 用户组数据表名
        'auth_group_access'  => 'auth_group_access', // 用户-用户组关系表
        'auth_rule'          => 'auth_rule',         // 权限规则表
        'auth_user'          => 'admin'             // 用户信息表
    ],
];
运行数据库导入文件吗,导入权限相关表
在admin应用下创建lang 多语言目录
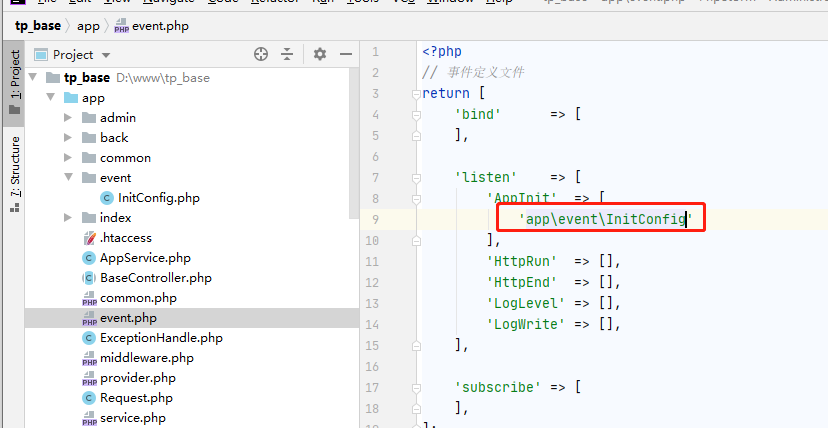
admin应用下创建event目录->initConfig.php 初始化常量以及基础配置
注册到event文件里

创建admin下BaseModel以及Admin model
BaseModel 定义getLang方法,获取语言包, success,err通用方法
model/Admin 创建admin表的模型 ,以及获取admin的方法
创建login的controller,view
copy 各种css,js
static 创建 app/admin目录 用来存放admin专用的一些css js文件
captcha需要打开gd2拓展
不输出验证码的话可以自己写一个验证码的function
//Captcha
public function captcha()
{
    ob_end_clean();
    return Captcha::create();
}
app/common.php 配置公共function
app/model.php 配置通用model类
登录成功
创建admin/index 首页controller和view
这个时候就要开始权限管理的配置了
因为在admin/index就会有menu展示,需要涉及到权限的东西
const bMapTransQQMap = function(lng,lat){
	let x_pi = 3.14159265358979324 * 3000.0 / 180.0;
	let x = lng - 0.0065;
	let y = lat - 0.006;
	let z = Math.sqrt(x * x + y * y) - 0.00002 * Math.sin(y * x_pi);
	let theta = Math.atan2(y, x) - 0.000003 * Math.cos(x * x_pi);
	let lngs = z * Math.cos(theta);
	let lats = z * Math.sin(theta);
	return {
		lng: lngs+0.0005,
		lat: lats
	}
}

const qqMapTransBMap = function(lng,lat){
	let x_pi = 3.14159265358979324 * 3000.0 / 180.0;
	let x = lng;
	let y = lat;
	let z = Math.sqrt(x * x + y * y) + 0.00002 * Math.sin(y * x_pi);
	let theta = Math.atan2(y, x) + 0.000003 * Math.cos(x * x_pi);
	let lngs = z * Math.cos(theta) + 0.0065;
	let lats = z * Math.sin(theta) + 0.006;
	return {
		//经度
		lng: lngs-0.0005,
		//纬度
		lat: lats
	}
}

export default {
    bMapTransQQMap,
	qqMapTransBMap,
}
参照这篇blog
https://www.cnblogs.com/sjj33sda/p/13984621.html
//a页面
uni.setStorageSync('test_key', 123);

// b页面
// 在onshow 或者onload 中取值
uni.getStorageSync('test_key');
项目需求使用uniapp 在小程序和h5端使用地图并支持选点
遇到以下问题:
小程序内运行<iframe>会是空的
使用web-view 组件传入腾讯地图的src后也不行
没有办法只能去做适配 零散代码如下:
manifest.json
/* 小程序特有相关 */
"mp-weixin": {
	"appid": "U appid xxxxxxxxx",
	"setting": {
		"urlCheck": false,
		"es6": true
	},
	"usingComponents": true,
	"permission": {
		"scope.userLocation": {
			"desc": "你的位置信息将用于小程序定位"
		}
	},
	"plugins": {
		"chooseLocation": {
			"version": "1.0.5",
			"provider": "wx76a9a06e5b4e693e"
		}
	}
},
H5端选点后,获取到选点坐标内容 做相关处理
//url https://apis.map.qq.com/tools/locpicker?search=1&type=1&key=U3MBZ-VGILU-WIPVM-2UEDJ-HOZT6-XAF6G&referer=myapp

<uni-popup ref="popup" type="bottom" class="buttom_popup">
    <iframe :src=this.url id="mapPage" width="100%" height="500rpx" frameborder=0></iframe>
</uni-popup>

onLoad: function(e) {
	  //#ifdef H5
	  window.addEventListener('message', function(event) {
		var loc = event.data;
		if (loc && loc.module == 'locationPicker') {
			that.changeLoc(loc);
		}
	  }, false);
	  //#endif
},
小程序端引入组件,初始化
onShow: function(){
	//#ifdef MP-WEIXIN
	const chooseLocation = requirePlugin('chooseLocation')
	const location = chooseLocation.getLocation() // 如果点击确认选点按钮,则返回选点结果对象,否则返回null
	console.log("您所选择的位置:", location)
	if(location){
		//拿到选点后做相关逻辑处理
	}
	//#endif
},
//part view
<input @click="open" disabled="true" name="coordinates" class="uni-input" placeholder="地图坐标" v-model="formData.coordinates"/>

//part function
open(){
	//#ifdef H5
	//如果是h5 通过popup层打开iframe窗口调用地图组件
	this.$refs.popup.open()
	//#endif

	//#ifdef MP-WEIXIN
	//如果是小程序 调用function 跳转地图页面选点 选点后会回到本,在onShow里接收选点信息,再做相关逻辑处理
	this.getAddress();
	//#endif

},
getAddress() {
	const key = 'U3MBZ-VGILU-WIPVM-2UEDJ-HOZT6-XAF6G' //使用在腾讯位置服务申请的key
	const referer = 'Leo' //调用插件的app的名称

	//初始化选点坐标
	const location = JSON.stringify({
		latitude: xxxxxx,
		longitude: xxxxxxx
	})

	wx.navigateTo({
		url: 'plugin://chooseLocation/index?key=' + key + '&referer=' + referer + '&location=' + location
	});
},
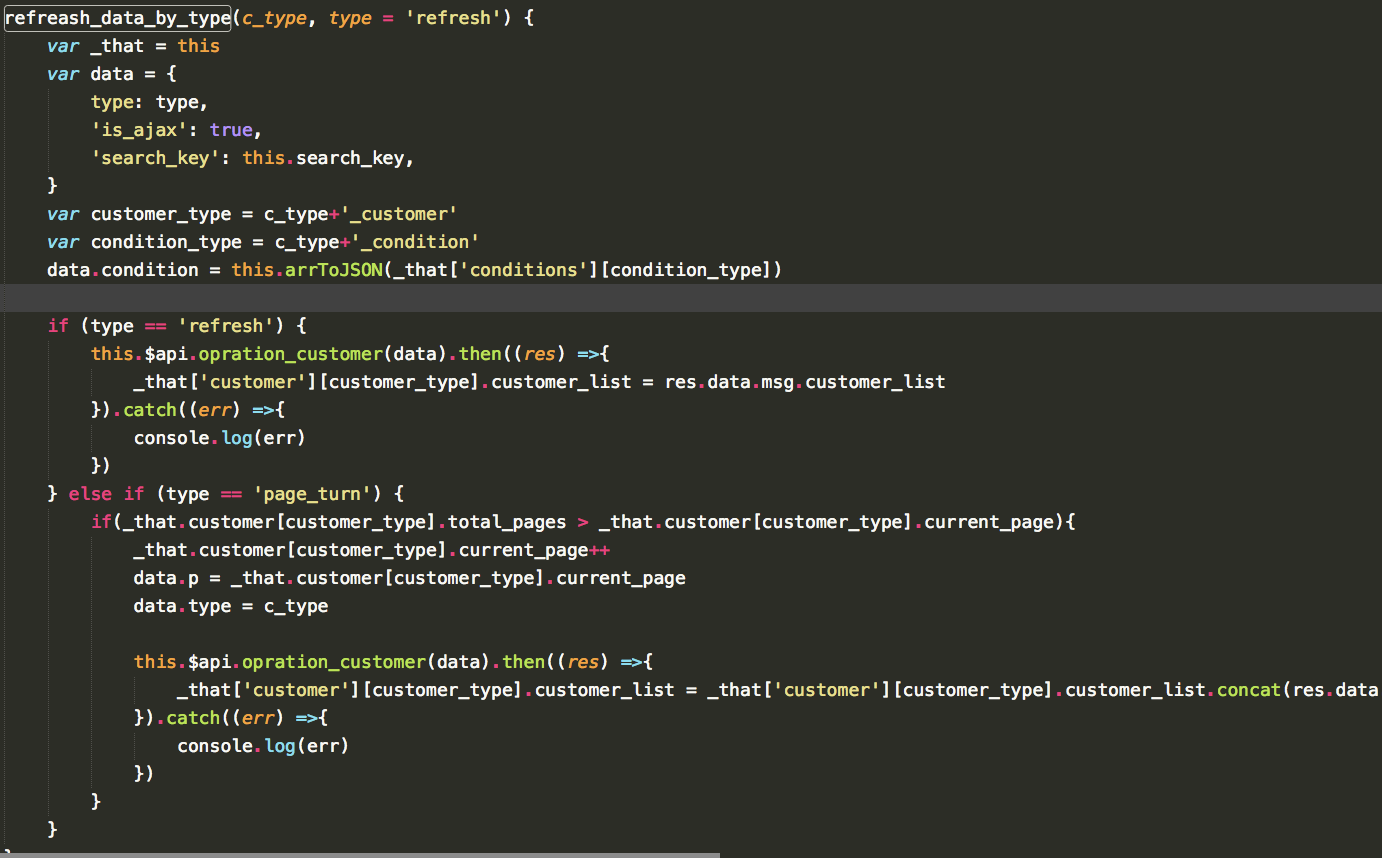
对比一下在写housing的时候和customer优化过之后
Housing

Customer

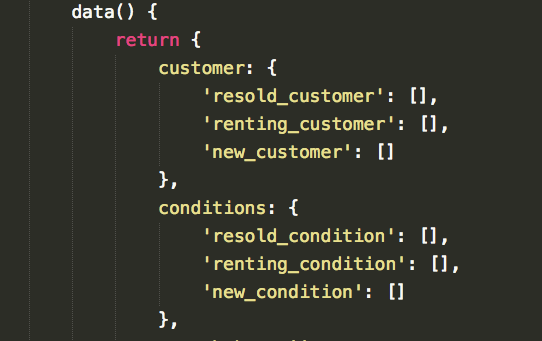
明显不用eval的代码可读性和可维护性要高很多了
只需要在data里把数据结构先配置好

然后就可以用变量名拼接 像这样通过参数处理多重类型
