notadd 初始化所有modules

notadd\vendor\notadd\framework\src\Module\ModuleManager.php

function getModules

/**
 * Modules of list.
 *
 * @return \Illuminate\Support\Collection
 */
public function getModules()
{
    if ($this->modules->isEmpty()) {
        if ($this->files->isDirectory($this->getModulePath())) {
            collect($this->files->directories($this->getModulePath()))->each(function ($directory) {
                if ($this->files->exists($file = $directory . DIRECTORY_SEPARATOR . 'composer.json')) {
                    $package = new Collection(json_decode($this->files->get($file), true));
                    $identification = Arr::get($package, 'name');
                    $type = Arr::get($package, 'type');
                    if ($type == 'notadd-module' && $identification) {
                        $provider = '';
                        if ($entries = data_get($package, 'autoload.psr-4')) {
                            foreach ($entries as $namespace => $entry) {
                                $provider = $namespace . 'ModuleServiceProvider';
                            }
                        }
                        if ($this->files->exists($autoload = $directory . DIRECTORY_SEPARATOR . 'vendor' . DIRECTORY_SEPARATOR . 'autoload.php')) {
                            $this->files->requireOnce($autoload);
                        }
                        $authors = Arr::get($package, 'authors');
                        $description = Arr::get($package, 'description');
                        if (class_exists($provider)) {
                            $module = new Module($identification);
                            $module->setAuthor($authors);
                            $module->setDescription($description);
                            $module->setDirectory($directory);
                            $module->setEnabled($this->container->isInstalled() ? $this->container->make('setting')->get('module.' . $identification . '.enabled', false) : false);
                            $module->setInstalled($this->container->isInstalled() ? $this->container->make('setting')->get('module.' . $identification . '.installed', false) : false);
                            $module->setEntry($provider);
                            if (method_exists($provider, 'alias')) {
                                $module->setAlias(call_user_func([$provider, 'alias']));
                            } else {
                                $module->setAlias([$identification]);
                            }
                            method_exists($provider, 'description') && $module->setDescription(call_user_func([$provider, 'description']));
                            method_exists($provider, 'name') && $module->setName(call_user_func([$provider, 'name']));
                            method_exists($provider, 'script') && $module->setScript(call_user_func([$provider, 'script']));
                            method_exists($provider, 'stylesheet') && $module->setStylesheet(call_user_func([$provider, 'stylesheet']));
                            method_exists($provider, 'version') && $module->setVersion(call_user_func([$provider, 'version']));
                            $this->modules->put($identification, $module);
                        } else {
                            $this->unloaded->put($identification, [
                                'authors'        => $authors,
                                'description'    => $description,
                                'directory'      => $directory,
                                'identification' => $identification,
                                'provider'       => $provider,
                            ]);
                        }
                    }
                }
            });
        }
    }

    return $this->modules;
}

这个function 获取到所有的module

我想一定是系统初始化的时候初始化了每一个module 所以才能注册到module的route

notadd 查找/admin路由绑定的地方

一直想找notadd的后台时如何创建路由的,结果一直没有找到

今天总算是让我找到了

一下记录一下步骤

获取所有路由列表

php notadd route:list > D:route.txt
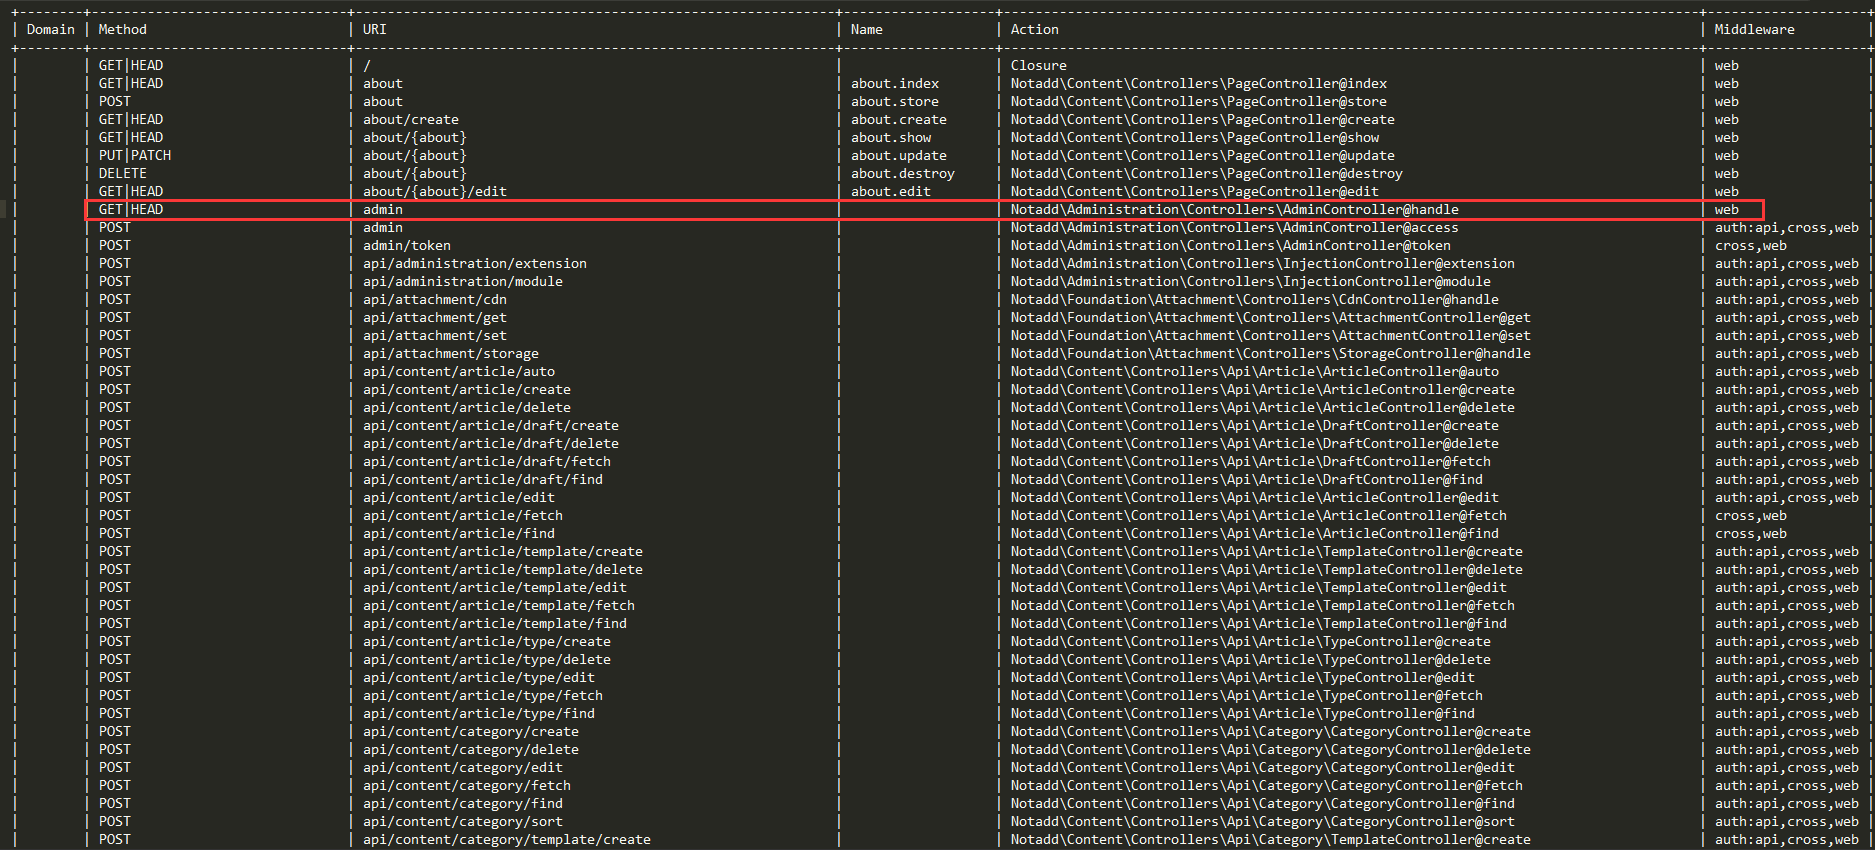
image.png

发现是在Notadd\Administration\Controllers\AdminController这个文件里定义的 

我打开notadd\modules\administration\src\ModuleServiceProvider.php

看到ModuleServiceProvider的boot function是这样的

/**
 * Boot service provider.
 *
 * @throws \Illuminate\Contracts\Container\BindingResolutionException
 */
public function boot()
{
    $administrator = new Administrator($this->app['events'], $this->app['router']);
    $administrator->registerPath('admin');
    $administrator->registerHandler(AdminController::class . '@handle');
    $this->administration->setAdministrator($administrator);
    $this->app->make(Dispatcher::class)->subscribe(CsrfTokenRegister::class);
    $this->app->make(Dispatcher::class)->subscribe(PermissionGroupRegister::class);
    $this->app->make(Dispatcher::class)->subscribe(PermissionModuleRegister::class);
    $this->app->make(Dispatcher::class)->subscribe(PermissionRegister::class);
    $this->app->make(Dispatcher::class)->subscribe(PermissionTypeRegister::class);
    $this->app->make(Dispatcher::class)->subscribe(RouteRegister::class);
    $this->loadTranslationsFrom(realpath(__DIR__ . '/../resources/translations'), 'administration');
    $this->loadViewsFrom(realpath(__DIR__ . '/../resources/views'), 'admin');
    $this->publishes([
        realpath(__DIR__ . '/../resources/mixes/administration/dist/assets/admin') => public_path('assets/admin'),
        realpath(__DIR__ . '/../resources/mixes/neditor')                          => public_path('assets/neditor'),
    ], 'public');
}

重点是这几行

image.png

我不知道registerPath和registerHandler是做什么用的,那么我向上追溯到了notadd\vendor\notadd\framework\src\Administration\Abstracts\Administrator.php

/**
 * Init administrator.
 *
 * @throws \InvalidArgumentException
 */
final public function init()
{
    if (is_null($this->path) || is_null($this->handler)) {
        throw new InvalidArgumentException('Handler or Path must be Setted!');
    }
    $this->router->group(['middleware' => 'web'], function () {
        $this->router->get($this->path, $this->handler);
    });
}

/**
 * Register administration handler.
 *
 * @param $handler
 */
public function registerHandler($handler)
{
    $this->handler = $handler;
}

/**
 * Register administration route path.
 *
 * @param string $path
 */
public function registerPath($path)
{
    $this->path = $path;
}

发现了这些代码,好吧 原来这个路由是在这里去绑定的······ 怪不得我开始怎么找也找不到呢

所以是吧/admin  绑定到了notadd\modules\administration\src\Controllers\AdminController.php 的 handle function

/**
 * Return index content.
 *
 * @param \Notadd\Foundation\Extension\ExtensionManager $extension
 * @param \Notadd\Foundation\Module\ModuleManager       $module
 *
 * @return \Illuminate\Contracts\View\View
 */
public function handle(ExtensionManager $extension, ModuleManager $module)
{
    $this->share('extensions', $extension->getEnabledExtensions());
    $this->share('modules', $module->getEnabledModules());
    $this->share('translations', json_encode($this->translator->fetch('zh-cn')));
    return $this->view('admin::layout');
}

所以在这些操作之前,一定有一个地方初始化了所有的module

我想找到这个地方

Laravel 事件

事件类通常被保存在 app/Events 目录下,而它们的处理程序则被保存在 app/Handlers/Events 目录下。

leokim\app\Events\LeokimTestEvent.php

<?php

namespace App\Events;

use Illuminate\Broadcasting\Channel;
use Illuminate\Queue\SerializesModels;
use Illuminate\Broadcasting\PrivateChannel;
use Illuminate\Broadcasting\PresenceChannel;
use Illuminate\Foundation\Events\Dispatchable;
use Illuminate\Broadcasting\InteractsWithSockets;
use Illuminate\Contracts\Broadcasting\ShouldBroadcast;

class LeokimTestEvent
{
    use Dispatchable, InteractsWithSockets, SerializesModels;

    /**
     * Create a new event instance.
     *
     * @return void
     */
    public function __construct()
    {
        //
    }

    /**
     * Get the channels the event should broadcast on.
     *
     * @return Channel|array
     */
    public function broadcastOn()
    {
        return new PrivateChannel('channel-name');
    }
}

1.创建事件

php artisan make:event LeokimTestEvent

2.创建事件handle

leokim\app\Handlers\Events\LeokimTestEventHandler.php

<?php
namespace App\Handlers\Events;
use App\Events\LeokimTestEvent;
use Illuminate\Queue\InteractsWithQueue;
use Illuminate\Contracts\Queue\ShouldBeQueued;

class LeokimTestEventHandler{
    public function __construct()
    {
    }

    public function handle(LeokimTestEvent $event)
    {
        echo '<br>事件触发测试';
    }
}

3.在EventServiceProvider中注册

leokim\app\Providers\EventServiceProvider.php

<?php

namespace App\Providers;

use Illuminate\Support\Facades\Event;
use Illuminate\Foundation\Support\Providers\EventServiceProvider as ServiceProvider;

class EventServiceProvider extends ServiceProvider
{
    /**
     * The event listener mappings for the application.
     *
     * @var array
     */
    protected $listen = [
        'App\Events\Event' => [
            'App\Listeners\EventListener',
        ],
        'App\Events\LeokimTestEvent' => [
            'App\Handlers\Events\LeokimTestEventHandler',
        ],
    ];

    /**
     * Register any events for your application.
     *
     * @return void
     */
    public function boot()
    {
        parent::boot();

        //
    }
}

4.在controller中触发

<?php

namespace App\Http\Controllers;
use App\Http\Controllers\Controller;
use Illuminate\Http\Request;
use App\Events\LeokimTestEvent;

class LeokimController extends Controller
{
    protected $leo;

    function __construct($leo)
    {
        $this->leo = $leo;
    }

    function index(){
        echo '123';
        event(new LeokimTestEvent());
    }

    function test($id){
        return $this->leo.$id;
    }
}

Laravel Contracts 学习笔记

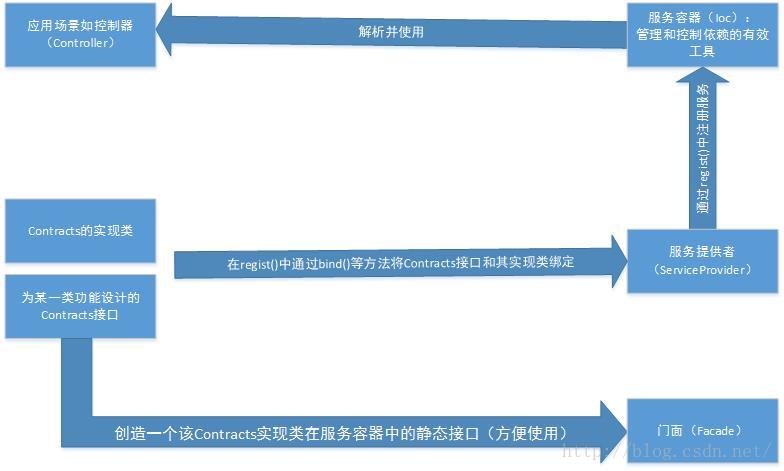
Laravel 的 Contracts 是一组定义了框架核心服务的接口。说白了就是一组接口。使用它就是为了降低耦合性。

即便如此,是不是也有同学会搞不清楚Contracts在lavarel体系中的到底在一个什么样的位置?下面上一张自制的图,也许有地方不对,但是初学的同学可以通过它大概的,简单的解决下心中的困惑。

20170425175642777.jpg

通过这张图我们可以看到,当写好自定义的Contract接口及其实现类后,在ServiceProvider中绑定,此时服务容器已经登记上这个Contract了。之后就可以在要用到它的地方,经过服务容器解析直接使用了。

下面就详细写一下怎么具体的使用:

第一步,写一个Contract接口:

<?php

namespace App\Contracts;

interface LeokimContract
{
    public function test($id);
}


第二步,写上面Contract的实现类:

<?php

use App\Contracts\LeokimContract;

class LeokimService implements LeokimContract
{
    function test($id){
        return "ID is :".$id;
    }
}

第三步,写一个自定义的ServiceProvider:

<?php

namespace App\Providers;

use App\Http\Controllers\LeokimController;
use Illuminate\Support\ServiceProvider;

class LeokimProviders extends ServiceProvider
{
    /**
     * Bootstrap the application services.
     *
     * @return void
     */
    public function boot()
    {
        //
    }

    /**
     * Register the application services.
     *
     * @return void
     */
    public function register()
    {
        //简单绑定
//        $this->app->bind(LeokimController::class, function (){
//            return new LeokimController('LeoKim-Test!! ');
//        });

        //给Contracts一个别名
//        $this->app->bind('LeokimContract','APP\Contracts\LeokimContract');

        //绑定接口到实现
        $this->app->bind('App\Contracts\LeokimContract','App\Services\LeokimService');
    }
}

这里起别名的作用,是为了在使用的时候方便,不需要写完整的命名空间;绑定的作用是为了使用Contracts时,服务容器能够有线索找到它的实现类,从而解析出来。

第四步,在config\app.PHP中注册这个服务提供者:

在providers中加入这行代码即可:

 App\Providers\HelloServiceProvider::class,

第五步,可以使用了:

<?php

namespace App\Http\Controllers;
use App\Http\Controllers\Controller;
use Illuminate\Http\Request;

use App\Contracts\LeokimContract;

class LeokimController extends Controller
{
    protected $leo;

//    function __construct($leo)
//    {
//        $this->leo = $leo;
//    }

    function __construct(LeokimContract $leo)
    {
        $this->leo = $leo;
    }

//    function index(){
//        echo '123';
//    }

    function test($id){
        return $this->leo->test($id);
    }
}
  1. 在构造方法中,将Contract接口引入(注入)这里参数中‘LeokimContract’就是刚才起的别名。

  2. 因为刚才已经在服务提供者中绑定了Contract和其实现方法,所以这里能够通过LeokimContract这个Contract,解析并使用其实现类中的方法test().

使用免费的ssl证书

小程序ajax请求都需要https 没办法 我只有自己弄一下

我这里要介绍的是另外一个 acme.sh 这个是用 Shell 脚本编写的,安装更容易,Let's Encrypt 那个 certbot 工具需要安装一大堆系统库以及 python 库,Python 的 pip 在国内还会有墙的问题…

安装acme.sh

curl https://get.acme.sh | sh

然后重新载入一下

source ~/.bashrc

现在就可以执行acme.sh命令了

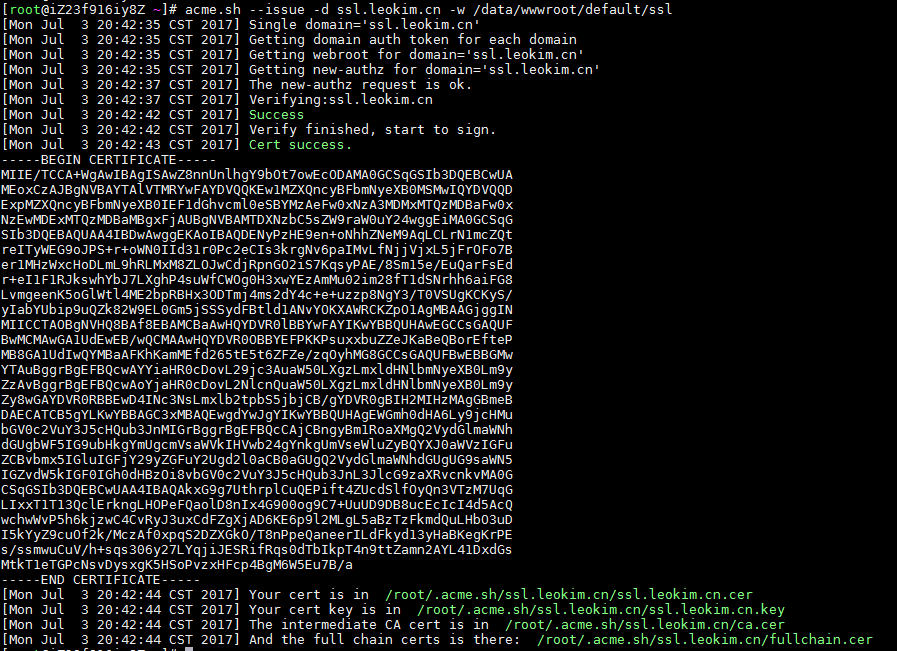
acme.sh --issue -d ssl.leokim.cn -w /data/wwwroot/default/ssl

这个以后就生成秘钥了

放到指定文件夹下 

用阿里云创建虚拟主机的程序跑就行了

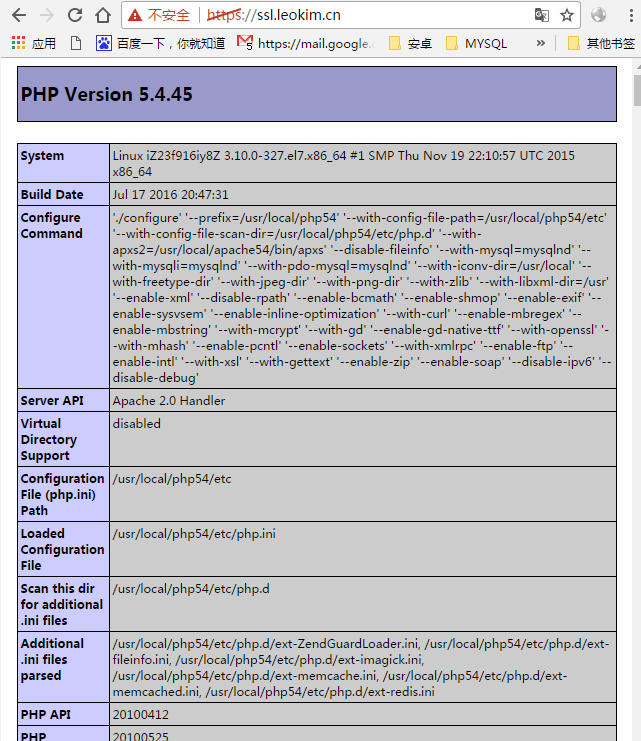
2.png

B3T8QJA1WQQDOW[FPJR0JLS.png

image.png

http://www.07net01.com/2017/01/1769454.html

======================================

昨天那个用不了 浏览器报不安全 然后今天我重新操作了一下

git clone https://github.com/letsencrypt/letsencrypt 
cd letsencrypt
./letsencrypt-auto certonly --manual -d ssl.leokim.cn

//证书在下面文件夹里
cd /etc/letsencrypt/live/ssl.leokim.cn/


//然后修改httpd配置文件 填好证书路径就好了
<VirtualHost *:443>
    ServerAdmin admin@linuxeye.com
    DocumentRoot "/data/wwwroot/default/ssl"
    ServerName ssl.leokim.cn

    SSLEngine on
    SSLCertificateFile "/etc/letsencrypt/archive/ssl.leokim.cn/fullchain1.pem"
    SSLCertificateKeyFile "/etc/letsencrypt/archive/ssl.leokim.cn/privkey1.pem"
    ErrorLog "/data/wwwlogs/ssl.leokim.cn_error_apache.log"
    CustomLog "/data/wwwlogs/ssl.leokim.cn_apache.log" common
<Directory "/data/wwwroot/default/ssl">
    SetOutputFilter DEFLATE
    Options FollowSymLinks ExecCGI
    Require all granted
    AllowOverride All
    Order allow,deny
    Allow from all
    DirectoryIndex index.html index.php
</Directory>
</VirtualHost>

使用Let‘s Encrypt为网站添加HTTPS