运行:systemctl restart systemd-logind
去芜存菁
运行:systemctl restart systemd-logind


2种写法一样


同

vue Bus总线
有时候两个组件也需要通信(非父子关系)。当然Vue2.0提供了Vuex,但在简单的场景下,可以使用一个空的Vue实例作为中央事件总线。
参考:http://blog.csdn.net/u013034014/article/details/54574989?locationNum=2&fps=1
例子:https://segmentfault.com/q/1010000007491994
<divid="app">
<c1></c1>
<c2></c2>
</div>
var Bus = new Vue(); //为了方便将Bus(空vue)定义在一个组件中,在实际的运用中一般会新建一Bus.js
Vue.component('c1', { //这里已全局组件为例,同样,单文件组件和局部组件也同样适用
    template: '<div>{{msg}}</div>',
    data: () = >({
        msg: 'Hello World!'
    }),
    created() {
        Bus.$on('setMsg', content = >{
            this.msg = content;
        });
    }
});
Vue.component('c2', {
    template: '<button @click="sendEvent">Say Hi</button>',
    methods: {
        sendEvent() {
            Bus.$emit('setMsg', 'Hi Vue!');
        }
    }
});
varapp = newVue({
    el: '#app'
})
在实际运用中,一般将Bus抽离出来:Bus.js
import Vue from 'vue'
const Bus=newVue()
exportdefaultBus
组件调用时先引入
组件1
import Bus from './Bus'
exportdefault {
    data() {
        return {.........
        }
    },
    methods: {....Bus.$emit('log', 120)
    },
}
组件2
import Bus from './Bus'
exportdefault {
    data() {
        return {.........
        }
    },
    mounted() {
        Bus.$on('log', content = >{
            console.log(content)
        });
    }
}
但这种引入方式,经过webpack打包后可能会出现Bus局部作用域的情况,即引用的是两个不同的Bus,导致不能正常通信
实际运用二(推荐):
当然也可以直接将Bus注入到Vue根对象中,
import Vue from 'vue'const Bus = newVue() varapp = newVue({
    el: '#app',
      data: {    Bus
    }
})
在子组件中通过this.$root.Bus.$on(),this.$root.Bus.$emit()来调用
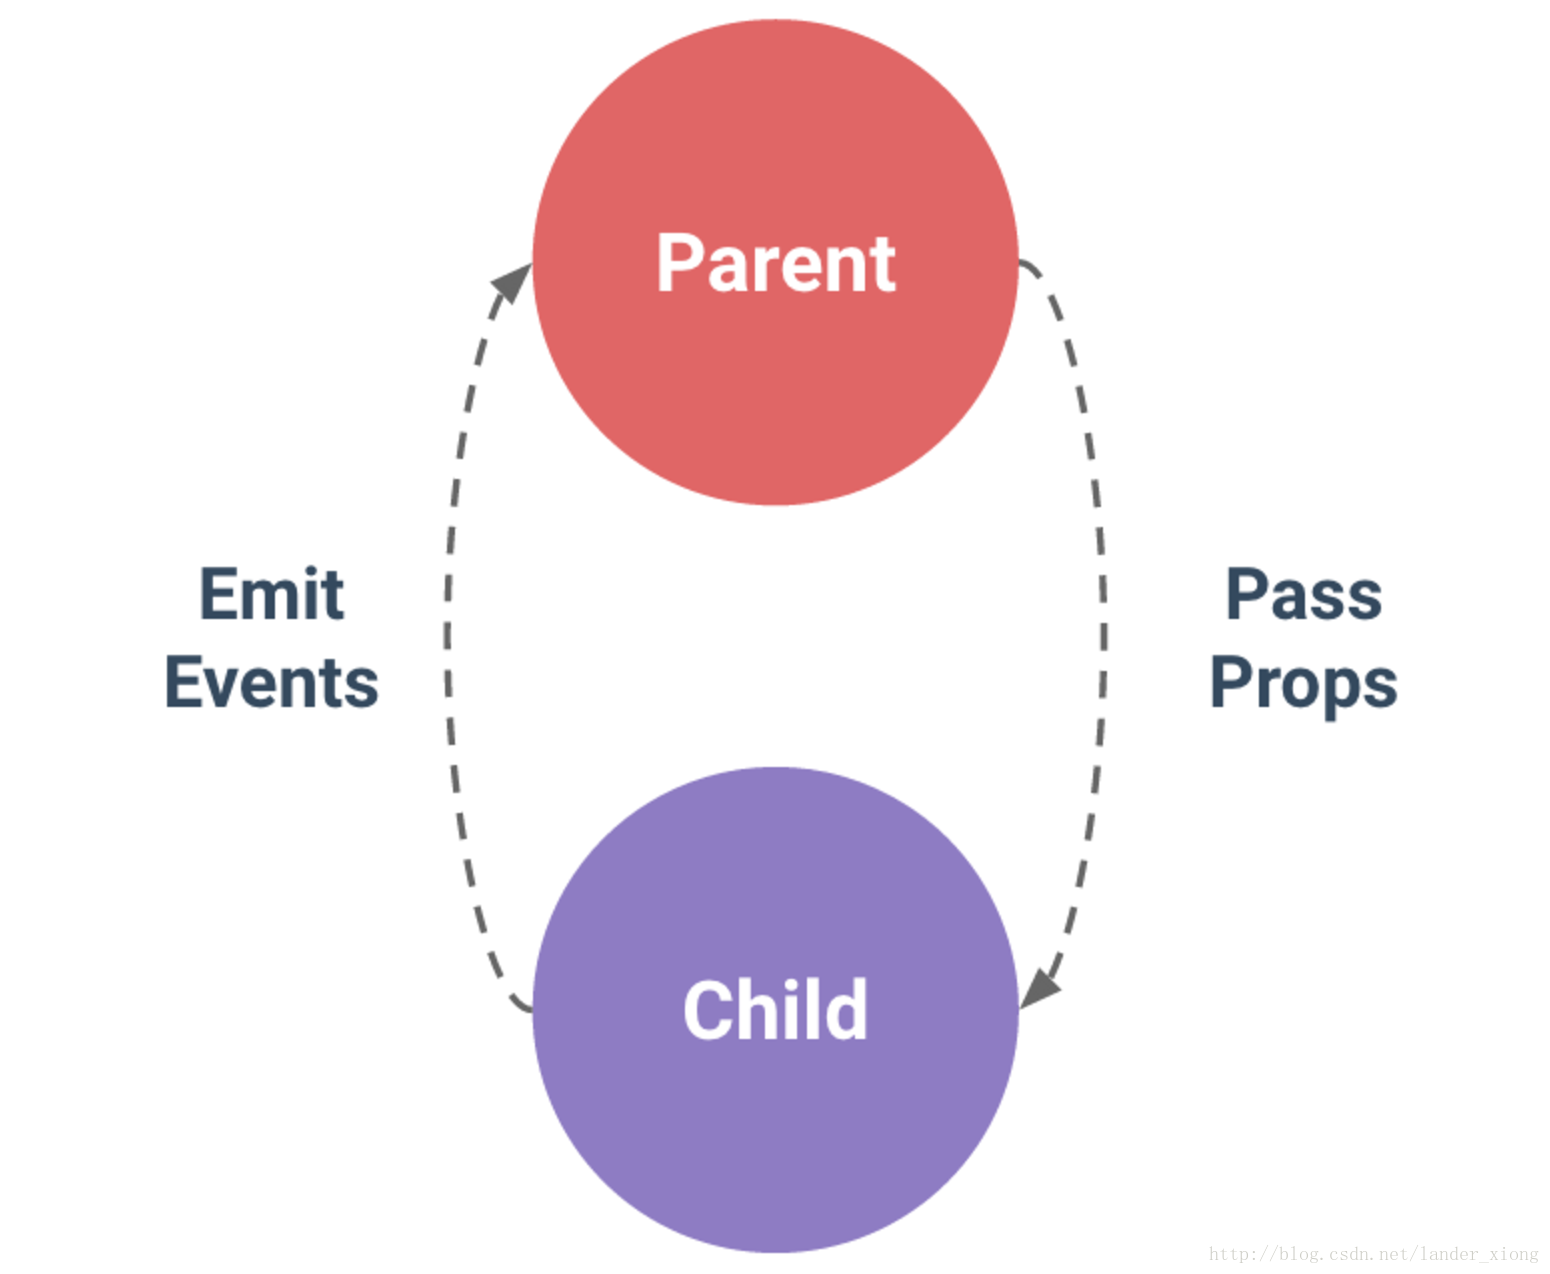
父组件向子组件传值
父组件
<template>
  <div>
    父组件:    <input type="text" v-model="name">
    <br>
    <br>
    <!-- 引入子组件 -->
    <child :inputName="name"></child>
  </div></template><script>
  import child from './child'
  export default {
    components: {
      child
    },
    data () {      return {
        name: ''
      }
    }
  }</script>
子组件
<template>
  <div>
    子组件:    <span>{{inputName}}</span>
  </div></template><script>
  export default {    // 接受父组件的值
    props: {
      inputName: String,
      required: true
    }
  }</script>
子组件向父组件传值
子组件
<template>
  <div>
    子组件:    <span>{{childValue}}</span>
    <!-- 定义一个子组件传值的方法 -->
    <input type="button" value="点击触发" @click="childClick">
  </div></template><script>
  export default {
    data () {      return {
        childValue: '我是子组件的数据'
      }
    },
    methods: {
      childClick () {        // childByValue是在父组件on监听的方法
        // 第二个参数this.childValue是需要传的值
        this.$emit('childByValue', this.childValue)
      }
    }
  }</script>
父组件
<template>
  <div>
    父组件:    <span>{{name}}</span>
    <br>
    <br>
    <!-- 引入子组件 定义一个on的方法监听子组件的状态-->
    <child v-on:childByValue="childByValue"></child>
  </div></template><script>
  import child from './child'
  export default {
    components: {
      child
    },
    data () {      return {
        name: ''
      }
    },
    methods: {
      childByValue: function (childValue) {
        // childValue就是子组件传过来的值
        this.name = childValue
      }
    }
  }</script>
非父子组件进行传值
公共bus.js
//bus.jsimport
Vue from 'vue'
export default new Vue()
组件A
<template>
  <div>
    A组件:    <span>{{elementValue}}</span>
    <input type="button" value="点击触发" @click="elementByValue">
  </div></template><script>
  // 引入公共的bug,来做为中间传达的工具
  import Bus from './bus.js'
  export default {
    data () {      return {
        elementValue: 4
      }
    },
    methods: {
      elementByValue: function () {
        Bus.$emit('val', this.elementValue)
      }
    }
  }</script>
组件B
<template>
  <div>
    B组件:    <input type="button" value="点击触发" @click="getData">
    <span>{{name}}</span>
  </div></template><script>
  import Bus from './bus.js'
  export default {
    data () {      return {
        name: 0
      }
    },
    mounted: function () {
      var vm = this
      // 用$on事件来接收参数
      Bus.$on('val', (data) => {
        console.log(data)
        vm.name = data
      })
    },
    methods: {
      getData: function () {
        this.name++
      }
    }
  }</script>
一. 项目结构目录调整
初始文件添加
.editorconfig

再使用EditorConfig for VS Code插件

添加目录
/api
/directive 自定义指令
/lib
/router
/store

/moke (npm isntall mockjs -D)
vue.config.js

基本配置修改