Laravel Contracts 学习笔记

Laravel 的 Contracts 是一组定义了框架核心服务的接口。说白了就是一组接口。使用它就是为了降低耦合性。

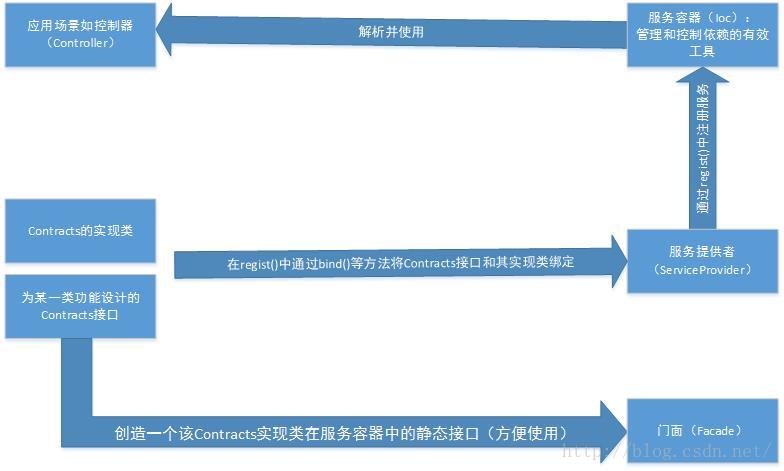
即便如此,是不是也有同学会搞不清楚Contracts在lavarel体系中的到底在一个什么样的位置?下面上一张自制的图,也许有地方不对,但是初学的同学可以通过它大概的,简单的解决下心中的困惑。

20170425175642777.jpg

通过这张图我们可以看到,当写好自定义的Contract接口及其实现类后,在ServiceProvider中绑定,此时服务容器已经登记上这个Contract了。之后就可以在要用到它的地方,经过服务容器解析直接使用了。

下面就详细写一下怎么具体的使用:

第一步,写一个Contract接口:

<?php

namespace App\Contracts;

interface LeokimContract
{
    public function test($id);
}


第二步,写上面Contract的实现类:

<?php

use App\Contracts\LeokimContract;

class LeokimService implements LeokimContract
{
    function test($id){
        return "ID is :".$id;
    }
}

第三步,写一个自定义的ServiceProvider:

<?php

namespace App\Providers;

use App\Http\Controllers\LeokimController;
use Illuminate\Support\ServiceProvider;

class LeokimProviders extends ServiceProvider
{
    /**
     * Bootstrap the application services.
     *
     * @return void
     */
    public function boot()
    {
        //
    }

    /**
     * Register the application services.
     *
     * @return void
     */
    public function register()
    {
        //简单绑定
//        $this->app->bind(LeokimController::class, function (){
//            return new LeokimController('LeoKim-Test!! ');
//        });

        //给Contracts一个别名
//        $this->app->bind('LeokimContract','APP\Contracts\LeokimContract');

        //绑定接口到实现
        $this->app->bind('App\Contracts\LeokimContract','App\Services\LeokimService');
    }
}

这里起别名的作用,是为了在使用的时候方便,不需要写完整的命名空间;绑定的作用是为了使用Contracts时,服务容器能够有线索找到它的实现类,从而解析出来。

第四步,在config\app.PHP中注册这个服务提供者:

在providers中加入这行代码即可:

 App\Providers\HelloServiceProvider::class,

第五步,可以使用了:

<?php

namespace App\Http\Controllers;
use App\Http\Controllers\Controller;
use Illuminate\Http\Request;

use App\Contracts\LeokimContract;

class LeokimController extends Controller
{
    protected $leo;

//    function __construct($leo)
//    {
//        $this->leo = $leo;
//    }

    function __construct(LeokimContract $leo)
    {
        $this->leo = $leo;
    }

//    function index(){
//        echo '123';
//    }

    function test($id){
        return $this->leo->test($id);
    }
}
  1. 在构造方法中,将Contract接口引入(注入)这里参数中‘LeokimContract’就是刚才起的别名。

  2. 因为刚才已经在服务提供者中绑定了Contract和其实现方法,所以这里能够通过LeokimContract这个Contract,解析并使用其实现类中的方法test().

计算得出非连续数字分段

<?php

$array = array(10010,10011,10012,10013,10015,10016,10026,10027,10028,10029);

$range = get_num_range($array);

print_r($range);

function get_num_range($arr){

    $range = array();

    $i = 1;

    $tmp_min = $tmp_max = '';

    foreach($arr as $no){

        //如果没有此range的最小值 第一个就是最小值

        if(empty($tmp_min)){

            $tmp_min = $no;

        }

        //下一个值不存在计算出最大值

        $next_no = $no+1;

        if(!in_array($next_no,$arr) && !empty($next_no)){

            $tmp_max = $no;

            $range[] = array($tmp_min, $tmp_max);

            $tmp_min = '';

        }

    }

    return $range;

}

?>

swoole 动态进程池

<?php
/**
 * Created by PhpStorm.
 * User: LeoKim
 * Date: 2017/5/13
 * Time: 9:10
 */

class BaseProcess{
    private $process;

    private $process_list = [];
    private $process_use = [];
    private $min_worker_num = 3;
    private $max_worker_num = 6;

    private $current_num;

    public function __construct()
    {
        $this->process = new swoole_process(array($this, 'run'), false, 2);
        $this->process->start();

        swoole_process::wait();
    }

    public function run($worker)
    {
        $this->current_num = $this->min_worker_num;

        //创建初始进程
        for($i=0; $i < $this->current_num; $i++){
            $process = new swoole_process(array($this, 'task_run'), false, 2);
            $pid = $process->start();

            echo $pid.': 我被初始创建了.'.date('H:i:s').PHP_EOL;
            $this->process_list[$pid] = $process;
            $this->process_use[$pid] = 0;
        }

        foreach($this->process_list as $process){
            //pipe管道被读操作的时候执行闭包的function?
            $this->bind_set_empty($process);
        }

        swoole_timer_tick(1000, function($timer_id){
            static $index=0;
            $index = $index+1;
            $flag = true;

            //我们在前面定义过 当pid对应的值为0的时候表示该进程现在空闲
            foreach($this->process_use as $pid => $used){
                if($used == 0){
                    $flag = false;
                    //我们要使用空闲的进程,把进程标记成工作状态
                    $this->process_use[$pid] = 1;
                    $this->process_list[$pid]->write($index." Hi 我开始工作了.");
                    break;
                }
            }

            //如果没有进程是空闲的, 那么检查进程是否超过最大值,没超过的话创建新的进程
            if($flag && $this->current_num < $this->max_worker_num)
            {
                $process = new swoole_process(array($this, 'task_run'), false, 2);
                $pid = $process->start();
                $this->process_list[$pid] = $process;
                $this->process_use[$pid] = 1 ;
                $this->process_list[$pid]->write($index." Hi 我是新来的,我开始工作了.");
                $this->current_num++;

                $this->bind_set_empty($process);
            }

            //执行n次退出
            if($index==20){
                foreach($this->process_list as $process){
                    foreach($this->process_list as $process){
                        $process->write("任务完毕 我退出了.");
                    }
                    swoole_timer_clear($timer_id);
                    $this->process->exit();
                }
            }
        });
    }

    //进程在创建的时候被执行
    public function task_run($worker)
    {
        //为每个进程绑定回调,当进程执行write的时候触发
        swoole_event_add($worker->pipe, function($pipe) use($worker){
            $data = $worker->read();
            var_dump($worker->pid.": ".$data.' -- '.date('H:i:s'));echo PHP_EOL;
            if($data == '任务完毕 我退出了.')
            {
                $worker->exit();
                exit;
            }

            sleep(5);

            //当worker进程执行write的时候会出发line:43的回调函数
            //把进程标记为空闲
            $worker->write($worker->pid);
        });
    }

    public function bind_set_empty($worker){
        swoole_event_add($worker->pipe, function($pipe) use($worker){
            $pid= $worker->read();
            echo $pid.' 报告,我处理完了之前的任务现在空下来了.'.date('H:i:s').PHP_EOL;
            $this->process_use[$pid] =  0;
        });
    }
}

new BaseProcess();

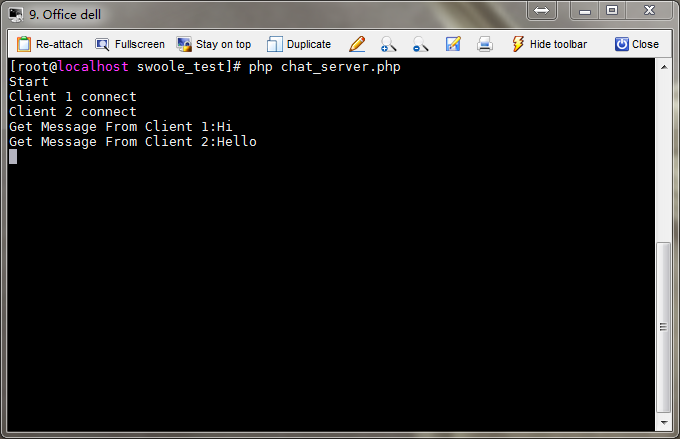
swoole 简单聊天室

服务端

<?php
/**
 * Created by PhpStorm.
 * User: LeoKim
 * Date: 2017/5/12
 * Time: 23:05
 */

class Server{
    private $serv;
    private $test;

    public function __construct()
    {
        $this->serv = new swoole_server("0.0.0.0", 9502);
        $this->serv->set(
            array(
                'worker_num' => 1,
            )
        );

        $this->serv->on('Start', array($this, 'onStart'));
        $this->serv->on('Connect', array($this, 'onConnect'));
        $this->serv->on('Receive', array($this, 'onReceive'));
        $this->serv->on('Close', array($this, 'onClose'));

        $this->serv->start();
    }

    public function onStart( $serv ) {
        echo "Start\n";
    }

    public function onConnect( $serv, $fd, $from_id ) {
        echo "Client {$fd} connect\n";
    }

    public function onClose( $serv, $fd, $from_id ) {
        echo "Client {$fd} close connection\n";
    }

    public function onReceive( swoole_server $serv, $fd, $from_id, $data){
        echo "Get Message From Client {$fd}:{$data}\n";
        foreach($serv->connections as $client){
            if($fd != $client)
            $serv->send($client, $data);
        }
    }
}

$server = new Server();

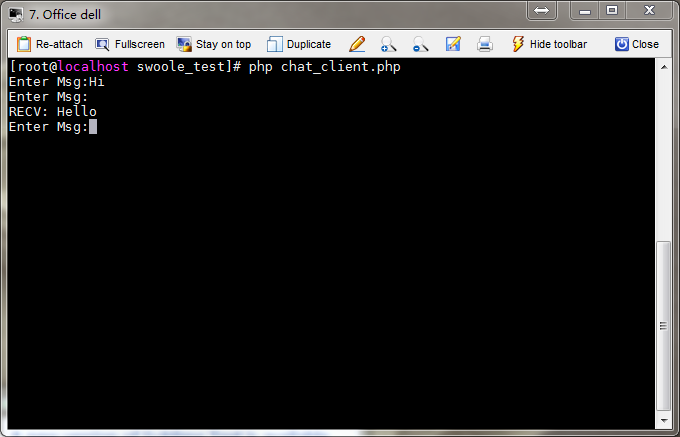
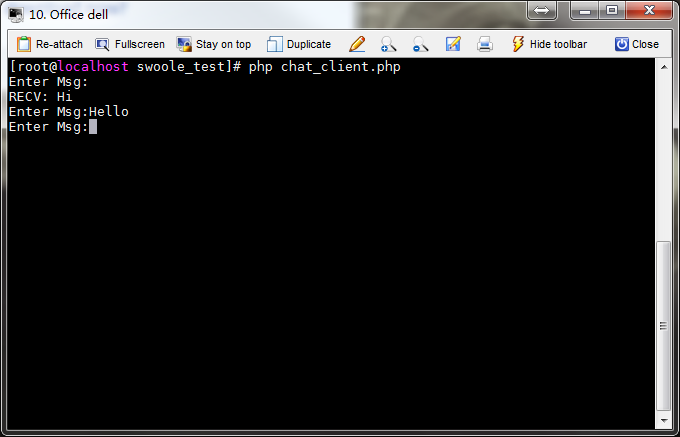
客户端

<?php
/**
 * Created by PhpStorm.
 * User: LeoKim
 * Date: 2017/5/12
 * Time: 23:13
 */

$socket = stream_socket_client("tcp://127.0.0.1:9502", $errno, $errstr, 30);

function OnRead()
{
    global $socket;
    $buffer = stream_socket_recvfrom($socket, 1024);
    if(!$buffer)
    {
        echo "Server clised\n";
    }
    echo "\nRECV: {$buffer}\n";
    fwrite(STDOUT, "Enter Msg:");
}

function onWrite()
{
    global $socket;
    echo "on Write\n";
}

function onInput()
{
    global $socket;
    $msg = trim(fgets(STDIN));

    if($msg == 'exit'){
        swoole_event_exit();
        exit();
    }

    swoole_event_write($socket, $msg);
    fwrite(STDOUT, "Enter Msg:");
}

swoole_event_add($socket, 'onRead', 'onWrite');

swoole_event_add(STDIN, 'onInput');

fwrite(STDOUT, "Enter Msg:");

image.png

image.png

image.png

laravel5集成angular2

这个问题我之前一直在思考

学习angular的过程中都是把angular视为一个完整的前端存在

也就是脱离了后端的独立存在

在代码里不去插入动态语言

在前端完成数据的存储,通信,绑定,修改

与后端可以用http协议交互,像app一样只做展示的前端操作

angular2通过ng server创建http服务

我想要把angular2结合laravel5一起使用

开始我觉得是不是angular2就像上面说的那样还是通过ng server创建服务

运行在4200端口 然后nginx反向代理到4200端口访问angular

然后angular通过http协议与laravel后端通信

google了之后发现使用angular2的开发模式(development mode)可以直接使用

而之前ng server只是单独为了让程序跑起来提供的一个服务

如今又laravel了 就可以不用创建那个服务 直接在这个上面跑

哎 还是基础不好思维有限 慢慢补吧

让我们开始吧!首先要安装基础laravel应用

image.png

我们需要获取angular2和typescript源码

在新创建的文件夹(larangular)中可以看到package.json文件

修改

{
  "private": true,
  "scripts": {
    "dev": "npm run development",
    "development": "cross-env NODE_ENV=development node_modules/webpack/bin/webpack.js --progress --hide-modules --config=node_modules/laravel-mix/setup/webpack.config.js",
    "watch": "cross-env NODE_ENV=development node_modules/webpack/bin/webpack.js --watch --progress --hide-modules --config=node_modules/laravel-mix/setup/webpack.config.js",
    "watch-poll": "npm run watch -- --watch-poll",
    "hot": "cross-env NODE_ENV=development node_modules/webpack-dev-server/bin/webpack-dev-server.js --inline --hot --config=node_modules/laravel-mix/setup/webpack.config.js",
    "prod": "npm run production",
    "production": "cross-env NODE_ENV=production node_modules/webpack/bin/webpack.js --progress --hide-modules --config=node_modules/laravel-mix/setup/webpack.config.js"
  },
  "devDependencies": {
    "axios": "^0.15.3",
    "bootstrap-sass": "^3.3.7",
    "cross-env": "^3.2.3",
    "jquery": "^3.1.1",
    "laravel-mix": "0.*",
    "lodash": "^4.17.4",
    "vue": "^2.1.10",
    "concurrently": "^1.0.0",
    "del": "^2.2.0",
    "gulp": "^3.8.8"
  },
  "dependencies": {
    "angular2": "2.0.0-beta.0",
    "bootstrap-sass": "^3.0.0",
    "elixir-typescript": "^1.1.2",
    "es6-promise": "^3.0.2",
    "es6-shim": "^0.33.3",
    "laravel-elixir": "^4.0.0",
    "reflect-metadata": "0.1.2",
    "rxjs": "5.0.0-beta.0",
    "systemjs": "0.19.6",
    "zone.js": "0.5.10"
  }
}

现在执行npm install,所需要的文件将被下载到node_modules文件夹

image.png

完成之后,我们要添加Typescript在laravel项目的resouce/assets目录

在这个文件夹里我们要创建2个文件app.component.ts 和 boot.ts

import {Component} from 'angular2/core';
 
@Component({
    selector: 'my-app',
    template: '<h1>My First Angular 2 App</h1>'
})
export class AppComponent { }
import {bootstrap}    from 'angular2/platform/browser'
import {AppComponent} from './app.component'
 
bootstrap(AppComponent);

下面我们需要编写一个简单的Elixir task来完成Typescript

在主文件夹中创建gulpfile.js

var elixir = require('laravel-elixir');
var elixirTypscript = require('elixir-typescript');

/*
 |--------------------------------------------------------------------------
 | Elixir Asset Management
 |--------------------------------------------------------------------------
 |
 | Elixir provides a clean, fluent API for defining some basic Gulp tasks
 | for your Laravel application. By default, we are compiling the Sass
 | file for our application, as well as publishing vendor resources.
 |
 */

elixir(function(mix) {
    mix.sass('app.scss');

    mix.copy('node_modules/angular2', 'public/angular2');
    mix.copy('node_modules/rxjs', 'public/rxjs');
    mix.copy('node_modules/systemjs', 'public/systemjs');
    mix.copy('node_modules/es6-promise', 'public/es6-promise');
    mix.copy('node_modules/es6-shim', 'public/es6-shim');
    mix.copy('node_modules/zone.js', 'public/zone.js');

    mix.typescript('app.js','public/','/**/*.ts',{
        "target": "ES5",
        "module": "system",
        "moduleResolution": "node",
        "sourceMap": true,
        "emitDecoratorMetadata": true,
        "experimentalDecorators": true,
        "removeComments": false,
        "noImplicitAny": false,
    });

});

然后安装gulp

image.png

修改如下文件 node_modules/elixir_typescript/index.js 

new Task(pluginName, function () {
       var tsResult = gulp.src(assetPath + search)
           .pipe(ts(options, undefined, _laravelReporter.ElixirMessage()));
       return tsResult
           //  .pipe(concat(outputFileName))
             .pipe(gulp.dest(outputFolder));


   })

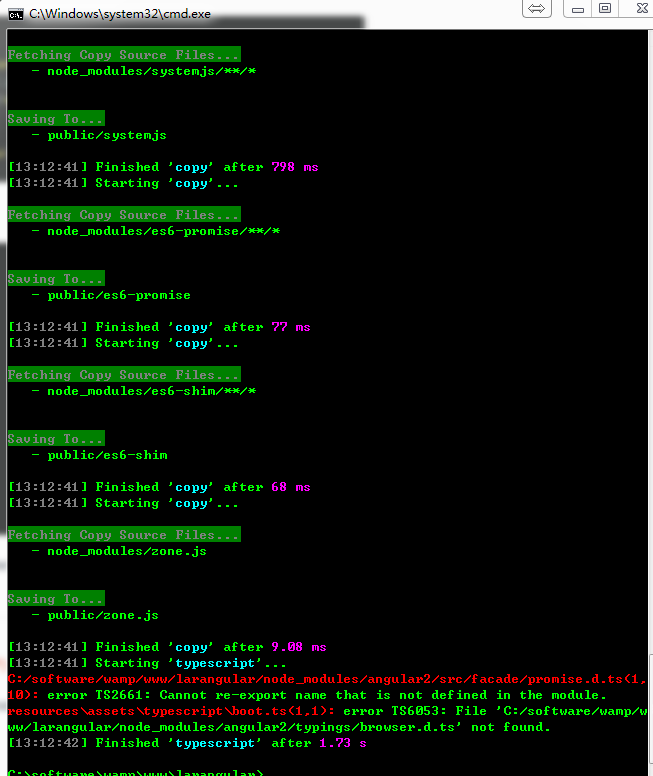
如果不修改会出现下面的错误
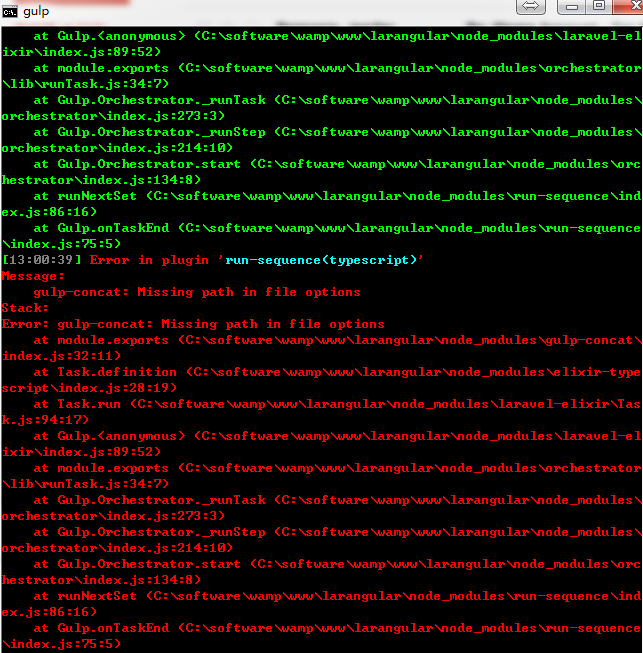
image.png

现在在程序根目录下执行gulp

image.png

全部执行完成

修改views

<!doctype html>
<html lang="{{ config('app.locale') }}">
    <head>
        <meta charset="utf-8">
        <meta http-equiv="X-UA-Compatible" content="IE=edge">
        <meta name="viewport" content="width=device-width, initial-scale=1">

        <title>Laravel</title>

        <!-- Fonts -->
        <link href="https://fonts.googleapis.com/css?family=Raleway:100,600" rel="stylesheet" type="text/css">

        <!-- Styles -->
        <style>
            html, body {
                background-color: #fff;
                color: #636b6f;
                font-family: 'Raleway', sans-serif;
                font-weight: 100;
                height: 100vh;
                margin: 0;
            }

            .full-height {
                height: 100vh;
            }

            .flex-center {
                align-items: center;
                display: flex;
                justify-content: center;
            }

            .position-ref {
                position: relative;
            }

            .top-right {
                position: absolute;
                right: 10px;
                top: 18px;
            }

            .content {
                text-align: center;
            }

            .title {
                font-size: 84px;
            }

            .links > a {
                color: #636b6f;
                padding: 0 25px;
                font-size: 12px;
                font-weight: 600;
                letter-spacing: .1rem;
                text-decoration: none;
                text-transform: uppercase;
            }

            .m-b-md {
                margin-bottom: 30px;
            }
        </style>

        <script src="es6-shim/es6-shim.min.js"></script>
        <script src="systemjs/dist/system-polyfills.js"></script>
         
        <script src="angular2/bundles/angular2-polyfills.js"></script>
        <script src="systemjs/dist/system.src.js"></script>
        <script src="rxjs/bundles/Rx.js"></script>
        <script src="angular2/bundles/angular2.dev.js"></script>

        <script>
            System.config({
              "defaultJSExtensions": true,
              packages: {
                app: {
                  format: 'register',
                  defaultExtension: 'js'
                }
              }
            });
         
         
            System.import('typescript/boot')
                  .then(null, console.error.bind(console));
          </script>
    </head>
    <body>
        <div class="flex-center position-ref full-height">
            @if (Route::has('login'))
                <div class="top-right links">
                    @if (Auth::check())
                        <a href="{{ url('/home') }}">Home</a>
                    @else
                        <a href="{{ url('/login') }}">Login</a>
                        <a href="{{ url('/register') }}">Register</a>
                    @endif
                </div>
            @endif

            <div>
                <div class="title m-b-md">
                    Laravel
                </div>
                <my-app>Loading...</my-app>

                <div>
                    <a href="https://laravel.com/docs">Documentation</a>
                    <a href="https://laracasts.com">Laracasts</a>
                    <a href="https://laravel-news.com">News</a>
                    <a href="https://forge.laravel.com">Forge</a>
                    <a href="https://github.com/laravel/laravel">GitHub</a>
                </div>
            </div>
        </div>
    </body>
</html>

成功了!!!
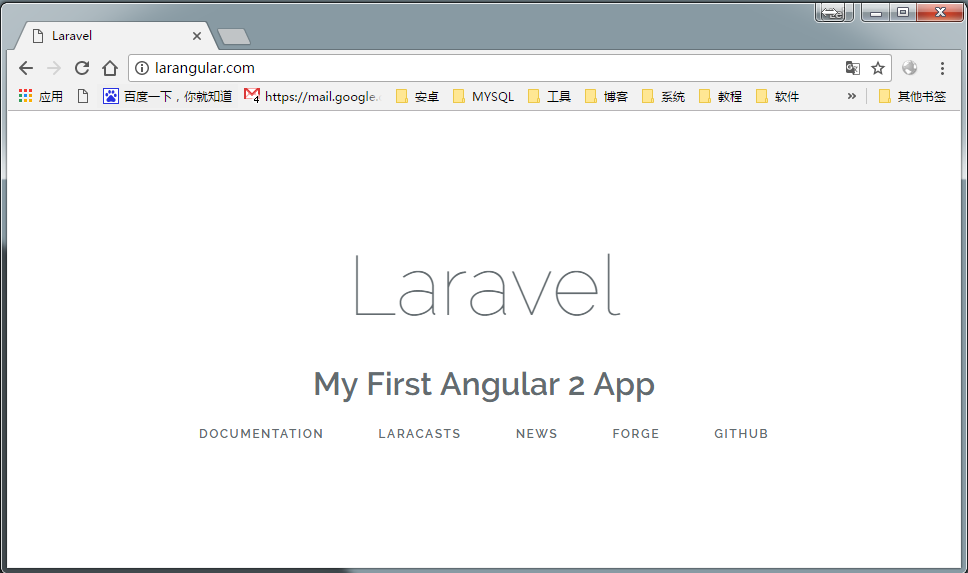
image.png

我把它放在了这里

https://git.oschina.net/iamleokim/larangular.git
nginx、swoole高并发原理初探

一、阅前热身

为了更加形象的说明同步异步、阻塞非阻塞,我们以小明去买奶茶为例。

1、同步与异步

①同步与异步的理解

同步与异步的重点在消息通知的方式上,也就是调用结果通知的方式。

  • 同步当一个同步调用发出去后,调用者要一直等待调用结果的通知后,才能进行后续的执行

  • 异步:当一个异步调用发出去后,调用者不能立即得到调用结果的返回。

异步调用,要想获得结果,一般有两种方式:
1、主动轮询异步调用的结果;
2、被调用方通过callback来通知调用方调用结果。

②:生活实例

同步买奶茶:小明点单交钱,然后等着拿奶茶;异步买奶茶:小明点单交钱,店员给小明一个小票,等小明奶茶做好了,再来取。

异步买奶茶,小明要想知道奶茶是否做好了,有两种方式:
1、小明主动去问店员,一会就去问一下:“奶茶做好了吗?”…直到奶茶做好。
2、等奶茶做好了,店员喊一声:“小明,奶茶好了!”,然后小明去取奶茶。


2、阻塞与非阻塞

①阻塞与非阻塞的理解

阻塞与非阻塞的重点在于进/线程等待消息时候的行为,也就是在等待消息的时候,当前进/线程是挂起状态,还是非挂起状态。

  • 阻塞阻塞调用在发出去后,在消息返回之前,当前进/线程会被挂起,直到有消息返回,当前进/线程才会被激活.

  • 非阻塞非阻塞调用在发出去后,不会阻塞当前进/线程,而会立即返回。

②:生活实例

阻塞买奶茶:小明点单交钱,干等着拿奶茶,什么事都不做;非阻塞买奶茶:小明点单交钱,等着拿奶茶,等的过程中,时不时刷刷微博、朋友圈…


3、总结

通过上面的分析,我们可以得知:

同步与异步,重点在于消息通知的方式;阻塞与非阻塞,重点在于等消息时候的行为。

所以,就有了下面4种组合方式

  • 同步阻塞:小明在柜台干等着拿奶茶;

  • 同步非阻塞:小明在柜台边刷微博边等着拿奶茶;

  • 异步阻塞:小明拿着小票啥都不干,一直等着店员通知他拿奶茶;

  • 异步非阻塞:小明拿着小票,刷着微博,等着店员通知他拿奶茶。


二、Nginx如何处理高并发

1、Apache面对高并发,为什么很无力?

Apache处理一个请求是同步阻塞的模式。

每到达一个请求,Apache都会去fork一个子进程去处理这个请求,直到这个请求处理完毕。

面对低并发,这种模式没什么缺点,但是,面对高并发,就是这种模式的软肋了。

  • 1个客户端占用1个进程,那么,进程数量有多少,并发处理能力就有多少,但操作系统可以创建的进程数量是有限的。

  • 多进程就会有进程间的切换问题,而进程间的切换调度势必会造成CPU的额外消耗。当进程数量达到成千上万的时候,进程间的切换就占了CPU大部分的时间片,而真正进程的执行反而占了CPU的一小部分,这就得不偿失了。

下面,举例说明这2种场景是多进程模式的软肋:

  • 及时消息通知程序比如及时聊天程序,一台服务器可能要维持数十万的连接(典型的C10K问题),那么就要启动数十万的进程来维持。这显然不可能。

  • 调用外部Http接口时假设Apache启动100个进程来处理请求,每个请求消耗100ms,那么这100个进程能提供1000qps。

但是,在我们调用外部Http接口时,比如QQ登录、微博登录,耗时较长,假设一个请求消耗10s,也就是1个进程1s处理0.1个请求,那么100个进程只能达到10qps,这样的处理能力就未免太差了。

注:什么是C10K问题?网络服务在处理数以万计的客户端连接时,往往出现效率低下甚至完全瘫痪,这被称为C10K问题。(concurrent 10000 connection)

综上,我们可以看出,Apache是同步阻塞的多进程模式,面对高并发等一些场景,是很苍白的。


2、Nginx何以问鼎高并发?

传统的服务器模型就是这样,因为其同步阻塞的多进程模型,无法面对高并发。
那么,有没有一种方式,可以让我们在一个进程处理所有的并发I/O呢?
答案是有的,这就是I/O复用技术。

①、I/O复用是神马?

最初级的I/O复用

所谓的I/O复用,就是多个I/O可以复用一个进程。

上面说的同步阻塞的多进程模型不适合处理高并发,那么,我们再来考虑非阻塞的方式。

采用非阻塞的模式,当一个连接过来时,我们不阻塞住,这样一个进程可以同时处理多个连接了。

比如一个进程接受了10000个连接,这个进程每次从头到尾的问一遍这10000个连接:“有I/O事件没?有的话就交给我处理,没有的话我一会再来问一遍。”
然后进程就一直从头到尾问这10000个连接,如果这1000个连接都没有I/O事件,就会造成CPU的空转,并且效率也很低,不好不好。

升级版的I/O复用

上面虽然实现了基础版的I/O复用,但是效率太低了。于是伟大的程序猿们日思夜想的去解决这个问题…终于!

我们能不能引入一个代理,这个代理可以同时观察许多I/O流事件呢?

当没有I/O事件的时候,这个进程处于阻塞状态;当有I/O事件的时候,这个代理就去通知进程醒来?

于是,早期的程序猿们发明了两个代理—select、poll。

select、poll代理的原理是这样的:

当连接有I/O流事件产生的时候,就会去唤醒进程去处理。

但是进程并不知道是哪个连接产生的I/O流事件,于是进程就挨个去问:“请问是你有事要处理吗?”……问了99999遍,哦,原来是第100000个进程有事要处理。那么,前面这99999次就白问了,白白浪费宝贵的CPU时间片了!痛哉,惜哉…

注:select与poll原理是一样的,只不过select只能观察1024个连接,poll可以观察无限个连接。

上面看了,select、poll因为不知道哪个连接有I/O流事件要处理,性能也挺不好的。

那么,如果发明一个代理,每次能够知道哪个连接有了I/O流事件,不就可以避免无意义的空转了吗?

于是,超级无敌、闪闪发光的epoll被伟大的程序员发明出来了。

epoll代理的原理是这样的:

当连接有I/O流事件产生的时候,epoll就会去告诉进程哪个连接有I/O流事件产生,然后进程就去处理这个进程。

如此,多高效!

②、基于epoll的Nginx

有了epoll,理论上1个进程就可以无限数量的连接,而且无需轮询,真正解决了c10k的问题。

Nginx是基于epoll的,异步非阻塞的服务器程序。自然,Nginx能够轻松处理百万级的并发连接,也就无可厚非了。

三、swoole如何处理高并发以及异步I/O的实现

1、swoole介绍

swoole是PHP的一个扩展。
简单理解:swoole=异步I/O+网络通信
PHPer可以基于swoole去实现过去PHP无法实现的功能。
具体请参考swoole官网:swoole官网


2、swoole如何处理高并发

①Reactor模型介绍

IO复用异步非阻塞程序使用经典的Reactor模型,Reactor顾名思义就是反应堆的意思,它本身不处理任何数据收发。只是可以监视一个socket(也可以是管道、eventfd、信号)句柄的事件变化。

注:什么是句柄?句柄英文为handler,可以形象的比喻为锅柄、勺柄。也就是资源的唯一标识符、资源的ID。通过这个ID可以操作资源。

Reactor只是一个事件发生器,实际对socket句柄的操作,如connect/accept、send/recv、close是在callback中完成的。

②swoole的架构

swoole采用 多线程Reactor+多进程Worker

swoole的架构图如下:

swoole的处理连接流程图如下:

当请求到达时,swoole是这样处理的:

请求到达 Main Reactor        |
        |Main Reactor根据Reactor的情况,将请求注册给对应的Reactor
(每个Reactor都有epoll。用来监听客户端的变化)        |
        |客户端有变化时,交给worker来处理        |
        |worker处理完毕,通过进程间通信(比如管道、共享内存、消息队列)发给对应的reactor。        |
        |reactor将响应结果发给相应的连接        |
        |
    请求处理完成

因为reactor基于epoll,所以每个reactor可以处理无数个连接请求。 如此,swoole就轻松的处理了高并发。

3、swoole如何实现异步I/O

基于上面的Swoole结构图,我们看到swoole的worker进程有2种类型:
一种是 普通的worker进程,一种是 task worker进程。

worker进程是用来处理普通的耗时不是太长的请求;task worker进程用来处理耗时较长的请求,比如数据库的I/O操作。

我们以异步Mysql举例:

耗时较长的Mysql查询进入worker            |
            |worker通过管道将这个请求交给taskworker来处理            |
            |worker再去处理其他请求            |
            |task worker处理完毕后,处理结果通过管道返回给worker            |
            |worker 将结果返回给reactor            |
            |reactor将结果返回给请求方

如此,通过worker、task worker结合的方式,我们就实现了异步I/O。

四、参考文章

Nginx 多进程模型是如何实现高并发的?
PHP并发IO编程之路
epoll 或者 kqueue 的原理是什么?
IO 多路复用是什么意思?

PHP使用Redis来存储session

Redis是一个高性能的key-value数据库,在部分场合可以对关系数据库起到很好的补充作用。现在越来越多的网站为了达到一个更高的可用性把session储存在Memcache、Redis等NoSQL数据库中。
方法一:修改php.ini的设置

session.save_handler = redis
session.save_path = "tcp://127.0.0.1:8089"#Redis服务的地址和端口

方法二:如果不想修改php.ini,可在代码中使用ini_set()方法:修改后重启php-fpm,phpinfo()可以查看到session存储在redis中。

ini_set("session.save_handler","redis");
ini_set("session.save_path","tcp://127.0.0.1:8089");

查看redis存储session的值:如果redis.conf设置了连接密码(requirepass),session的save_path需修改为:tcp://127.0.0.1:8089?auth=requirepass的值。如果选择redis数据库,session.save_path = “tcp://xx.xx.xx.xx:8089?database=11″,诸如此类。

session_start();
$_SESSION['website'] = 'www.leokim.cn';
$redis = new redis();
$redis->connect('192.168.31.102',8089);
echo $_SESSION['website']; //输出www.leokim.cn

centos php7安装redis拓展

wget https://codeload.github.com/phpredis/phpredis/zip/php7
unzip php7
cd phpredis-php7

这个地方要用php的phpize来生成configure

我试了几次都不成功 make失败

研究了一会发现linux上貌似默认执行的phpize是php5版本的 按路径调用php7的phpize就可以了

./configure
make && make install

修改php.ini配置 加上redis扩展 

//vim php.ini 添加 extension=redis.so
extension=redis.so

重启php-fpm 查看phpinfo就可以看到拓展已经安装成功了

blob.png

centos7 安装php7

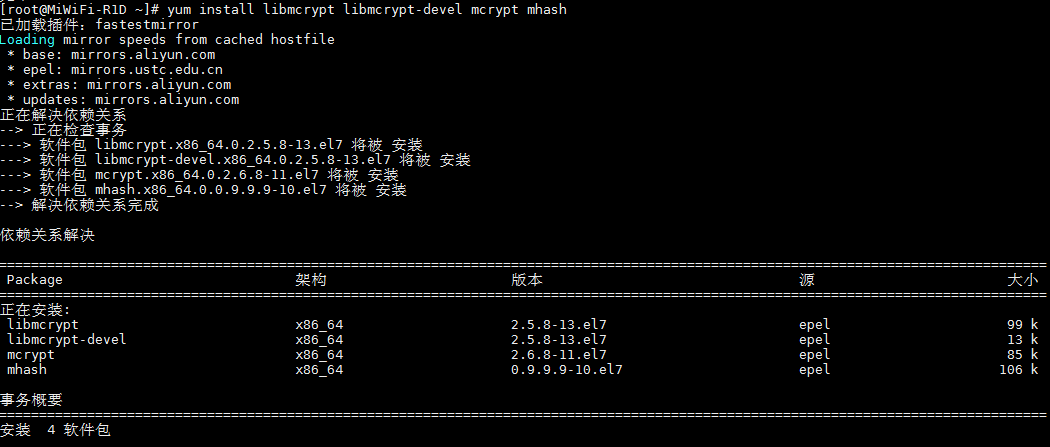
折腾了半天搞死找不到软件包

image.png

解决方法:

yum  install epel-release  //扩展包更新包
yum  update //更新yum源
yum install libmcrypt libmcrypt-devel mcrypt mhash  就ok了

终于可以了

image.png

image.png

简单安装(通过yum)

  1. 安装epel-release

    rpm -ivh http://dl.fedoraproject.org/pub/epel/7/x86_64/e/epel-release-7-5.noarch.rpm
  2. 安装PHP7的rpm源

    rpm -Uvh https://mirror.webtatic.com/yum/el7/webtatic-release.rpm
  3. 安装PHP7

    yum install php70w

编译安装

  1. 下载php7

    wget -O php7.tar.gz http://cn2.php.net/get/php-7.0.4.tar.gz/from/this/mirror
  2. 解压php7

    tar -xvf php7.tar.gz
  3. 进入php目录

    cd php-7.0.4
  4. 安装依赖包

    # 直接复制下面一行(不包括本行)
    yum install libxml2 libxml2-devel openssl openssl-devel bzip2 bzip2-devel libcurl libcurl-devel libjpeg libjpeg-devel libpng libpng-devel freetype freetype-devel gmp gmp-devel libmcrypt libmcrypt-devel readline readline-devel libxslt libxslt-devel
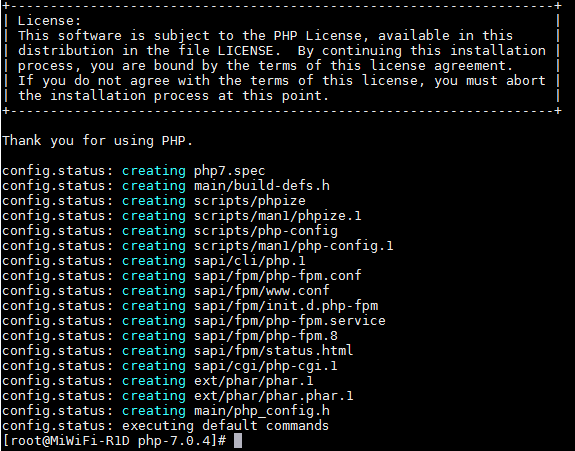
  5. 编译配置(如果出现错误,基本都是上一步的依赖文件没有安装所致)
    嫌麻烦的可以从这一步起参考PHP官方安装说明:http://php.net/manual/zh/install.unix.nginx.php

    ./configure \
    --prefix=/usr/local/php \
    --with-config-file-path=/etc \
    --enable-fpm \
    --with-fpm-user=nginx  \
    --with-fpm-group=nginx \
    --enable-inline-optimization \
    --disable-debug \
    --disable-rpath \
    --enable-shared  \
    --enable-soap \
    --with-libxml-dir \
    --with-xmlrpc \
    --with-openssl \
    --with-mcrypt \
    --with-mhash \
    --with-pcre-regex \
    --with-sqlite3 \
    --with-zlib \
    --enable-bcmath \
    --with-iconv \
    --with-bz2 \
    --enable-calendar \
    --with-curl \
    --with-cdb \
    --enable-dom \
    --enable-exif \
    --enable-fileinfo \
    --enable-filter \
    --with-pcre-dir \
    --enable-ftp \
    --with-gd \
    --with-openssl-dir \
    --with-jpeg-dir \
    --with-png-dir \
    --with-zlib-dir  \
    --with-freetype-dir \
    --enable-gd-native-ttf \
    --enable-gd-jis-conv \
    --with-gettext \
    --with-gmp \
    --with-mhash \
    --enable-json \
    --enable-mbstring \
    --enable-mbregex \
    --enable-mbregex-backtrack \
    --with-libmbfl \
    --with-onig \
    --enable-pdo \
    --with-mysqli=mysqlnd \
    --with-pdo-mysql=mysqlnd \
    --with-zlib-dir \
    --with-pdo-sqlite \
    --with-readline \
    --enable-session \
    --enable-shmop \
    --enable-simplexml \
    --enable-sockets  \
    --enable-sysvmsg \
    --enable-sysvsem \
    --enable-sysvshm \
    --enable-wddx \
    --with-libxml-dir \
    --with-xsl \
    --enable-zip \
    --enable-mysqlnd-compression-support \
    --with-pear \
    --enable-opcache
  6. 正式安装

    make && make install
  7. 配置环境变量

    vi /etc/profile

    在末尾追加

    PATH=$PATH:/usr/local/php/bin
    export PATH

    执行命令使得改动立即生效

    source /etc/profile
  8. 配置php-fpm

    cp php.ini-production /etc/php.ini
    cp /usr/local/php/etc/php-fpm.conf.default /usr/local/php/etc/php-fpm.conf
    cp /usr/local/php/etc/php-fpm.d/www.conf.default /usr/local/php/etc/php-fpm.d/www.conf
    cp sapi/fpm/init.d.php-fpm /etc/init.d/php-fpm
    chmod +x /etc/init.d/php-fpm
  9. 启动php-fpm

    /etc/init.d/php-fpm start

10.在系统服务目录里创建php-fpm.service文件

vim /lib/systemd/system/php-fpm.service

写入以下内容(路径改成自己的)

[Unit]
Description=php-fpm
After=network.target
[Service]
Type=forking
ExecStart=/usr/local/php/sbin/php-fpm
PrivateTmp=true
[Install]
WantedBy=multi-user.target

先关闭nginx,php-fpm
使用以下命令开启

systemctl start nginx.service             #如果服务是开启状态,使用此命令会启动失败。
systemctl start php-fpm.service

开启成功,将服务加入开机自启

systemctl enable nginx.service                #注意后面不能跟空格
systemctl enable php-fpm.service

image.png

image.png